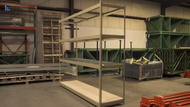
How to Assemble Rivet Shelving
Posted by Tom Compton on 31st Jul 2023
Rivet shelving, a.k.a. boltless shelving, is a fast, easy way to create heavy-duty storage in your warehouse, shop, or garage. Assembling these sturdy racks requires no nuts, no bolts, no power tools - just a leather mallet.
Watch as Tom and Luke demonstrate how quickly this rivet rack comes together.
"This is Tom and Luke with Industrial Shelving Systems, and today we're going to show you how to assemble rivet shelving, also known as boltless shelving or rivet rack. The unique thing about rivet shelving is that all you need is a leather mallet to assemble. No nuts or bolts are required.
Today, we'll be assembling a 96-inch wide by 24-inch deep unit. To begin, you'll need two posts and one of the side beams. The 24-inch side beams will have two rivets on it and an angle on the beam. You'll begin by taking the beam and inserting it into the two posts. You always want to leave one hole open on the bottom, so you'll insert the rivets in the second and third holes from the bottom. You'll continue this process with whatever spacing you'd like up the rest of the upright. You'll then repeat this process for the other side upright.
Depending on the length of your front beams and rear beams, you may get an angle beam just like your side beams were or a channel beam if they're 96 inches long. The channel beam will look like a 'c,' and the important part is to keep the diagonal cut in the upward position. The next step is to insert the front and back beams into the unit. It's easiest to take one upright, start at the bottom, and work your way up. Now, you'll take your other side upright and do the same thing to the other side. With your bottom level in place, you'll continue to put in the remainder of the front and rear beams. Depending on the length of your unit, a beam tie may be required. 48-inch wide front beams and shorter do not require beam ties. Anything larger than 48 inches will require a beam tie. This 96-inch unit requires two beam ties. The beam ties have two holes that will go right into the spots on the rivet on the front and back beams. Repeat this step for the remaining beam levels.
The final step of assembly is putting in the decking. There are two decking options. The first being a particle board wood decking. The wood decking sits directly on the beam levels and is held in by the angles of the posts. The other type of decking we offer is wire decking. The 72-inch wide and under units come in a one-piece deck and are installed the same way the particle board decking would. The 96-inch unit requires a two-piece wire deck secured by zip ties. Instructions will be provided with your order, but for the two-piece wire deck, you will secure them together into the unit via zip ties. Repeat the decking process on your remaining levels, and your rivet shelving unit is complete.
These heavy-duty rivet shelving units are great for bulky hand-loaded storage items. Industrial Shelving Systems has these units in stock, ready to ship. If you need help determining what size is best for your application, feel free to call or email, and one of our storage experts can help determine the size you need. We offer AutoCAD layouts at no charge and would love to help you with your project."

 US Dollar
